
Plotting Directly To ''PDF-XChange for AcroPlot Pro'' System Printer
The most efficient way to create a PDF file from AutoCAD is to use the AcroPlot / AcroPlot Pro menu and toolbar inside AutoCAD. AcroPlot / AcroPlot Pro software is made specifically for creating PDF files from AutoCAD that are rotated correctly, support ''lines merge'' settings, and are compact in file size.
It is not recommended that you use the ''Print / Plot" command for creating PDF files from within AutoCAD to a Microsoft Windows virtual printer due to the fact that AutoCAD and Windows virtual printing do not translate drawing orientation correctly. It is commonplace for a AutoCAD user to specify ''Landscape" in their AutoCAD plot settings, and ''Lanscape" in the printer/plotter printing preferences, only to achieve a PDF file that is rotated to ''Portrait" orientation. This situation can also happen when using the AutoCAD ''print/plot'' command and selecting the ''PDF-XChange for AcroPlot Pro'' system printer and is why we recommend using the AcroPlot / AcroPlot Pro menu and toolbar for creating PDF files from AutoCAD. AcroPlot will create a PDF correctly every time.
That being said, there are times when a CAD User will need print to the ''PDF-XChange for AcroPlot Pro'' system printer from AutoCAD to create a PDF file and the following steps describe the process.
NOTE: The ''PDF-XChange for AcroPlot Pro'' system printer is a common component installed with the AcroPlot Pro software application.
IMPORTANT FILENAME LENGTH LIMITATION: AutoCAD has an internal limitation of 140 characters that it can send out to any Windows System Printer Driver. If you have combined paths and filenames that are longer than 140 characters you must set the AutoCAD System Variable FullPlotPath=0 so that AutoCAD only sends out the filename and not the path and filename to avoid having your filenames truncated. In this case we will not know which path to save the file in so you will have to specify the path in the Save As Dialog or specify a path in the Printing Preferences Save Options.
Plotting to ''PDF-XChange for AcroPlot Pro'' Using the AutoCAD ''Plot'' command
Plotting or printing to a PDF file using the AutoCAD ''Plot'' command and selecting the ''PDF-XChange for AcroPlot Pro'' system printer will result in creating a PDF file that is saved to a specified folder. Even though the ''Plot'' command was executed, the final result is a file being created. No printing on any of your connected printing / plotting devices will occur. Once the PDF has been created and saved, you can open the PDF file for viewing and actual hardcopy printing.
Here are the steps for plotting to a PDF from AutoCAD using the ''PDF-XChange for AcroPlot Pro'' system printer driver.
|
1.
|
Launch AutoCAD and open a DWG file. AcroPlot / AcroPlot Pro has a sample file that is good for testing PDF creation. Here is the location to the CADzation Benchmark DWG to PDF file for AutoCAD: "C:\Program Files\AcroPlot\Samples\CADzation-DWG-to-PDF-Benchmark-FileR4.dwg"
|
|
2.
|
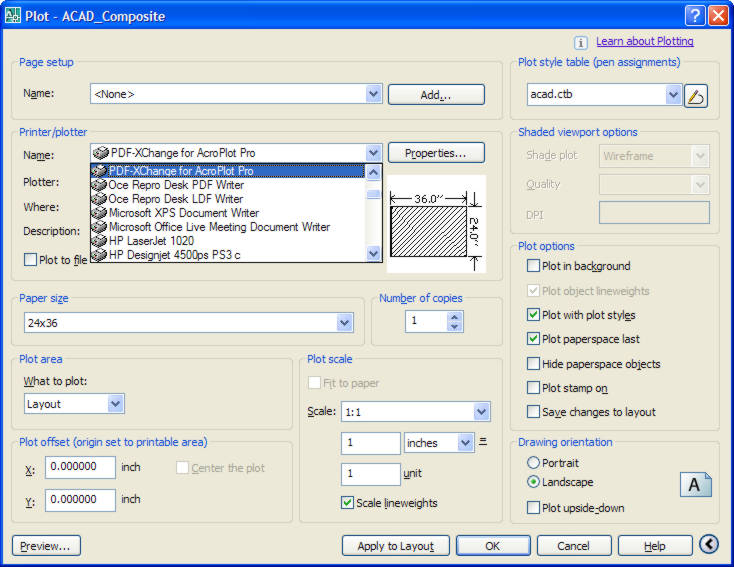
Select [File-->Plot...] to invoke the AutoCAD plot window.
|
|
3.
|
In the AutoCAD plot window select the ''PDF-XChange for AcroPlot Pro'' as the printer. (Do not use the AcroPlot.pc3 as this is specifically utilized by the AcroPlot / AcroPlot Pro software application).
|
|
4.
|
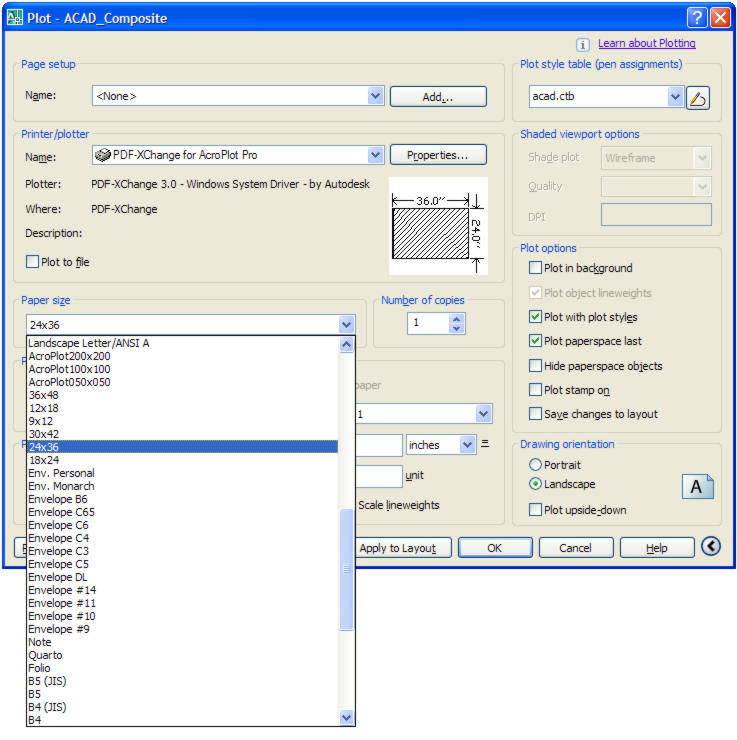
Select the paper size in the ''Paper size'' pulldown. The CADzation-DWG-to-PDF-Benchmark-FileR4.dwg is a D-size layout. So, choose 24x36 for the sheet size. Hint: In the sheet sizes available for the ''PDF-XChange for AcroPlot Pro'' system printer there are some standard sizes that are listed at pure numbers (12x18, 24x36, 36x48....) without any other description. These sheets contain additional background coding to assist in creating PDF files that are ''Landscape'' in orientation from AutoCAD and are recommended for PDF creation.
|
|
5.
|
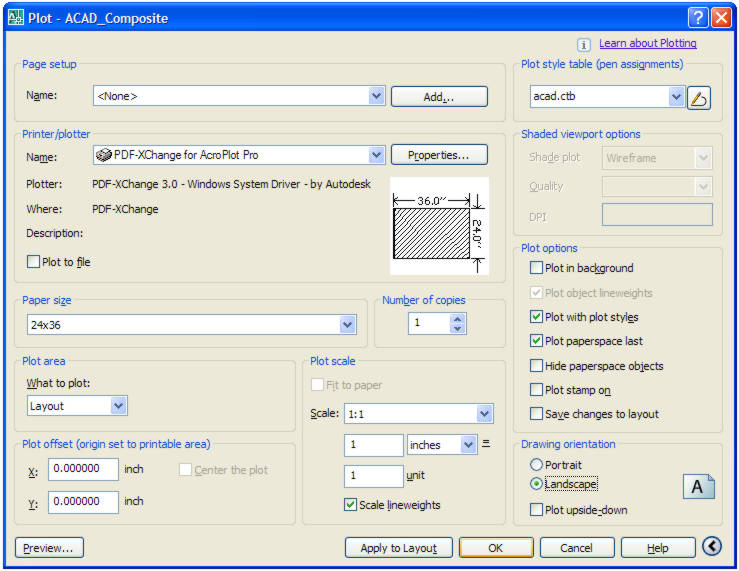
Set the remaining plot settings as needed.
|
|
6.
|
Select the ''OK" button to begin plotting to a PDF file.
|
|
7.
|
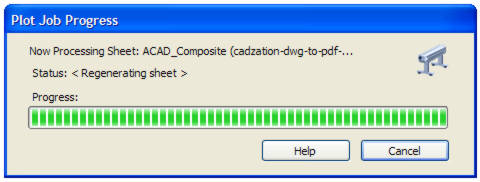
The AutoCAD "Plot Job Progress" status window will appear while the DWG file is being rendered to PDF.
|

|
8.
|
Once all plot processing is complete a ''Save As'' window will appear and allow you to specify the location to save the PDF file to, as well as, its file name.
|
|
9.
|
Select the ''Save'' button to save the PDF file.
|
Done! You just created a PDF file of your drawing from AutoCAD.
Did you know that you can print to the ''PDF-XChange for AcroPlot Pro'' system printer from any Windows software program to create a PDF file?
The ''PDF-XChange for AcroPlot Pro'' system printer has CAD specific programming built into it for creating the most optimized PDF files from other CAD applications like Bentley Microstation, CATIA, Pro/E, TurboCAD, and much more.