Adding PDF Form Fields to Stamps
Adding form fields to PDF files makes them interactive and is also a way to add automated functionality to stamps in AcroPlot Matrix. While some PDF files contain form fields that allow Users to enter and modify data while viewing the file, PDF files used as stamps will execute scripts and render the form fields static upon bringing the stamp into a file. Once the stamp is applied, no text modifications can be made to the stamp. The stamp is stamped.
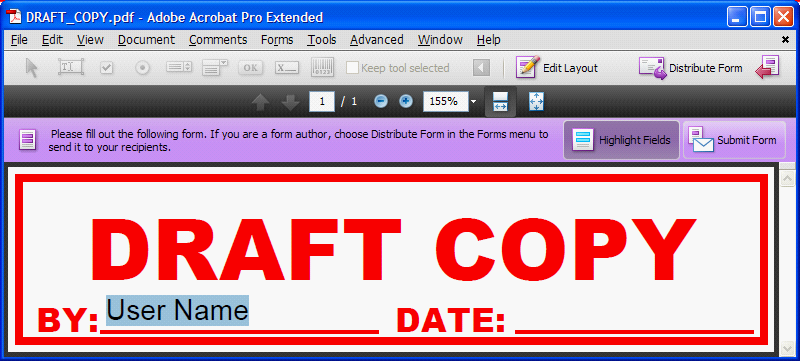
In the example below, we will demonstrate how to add fields to the “DRAFT COPY” stamp created earlier that will automatically enter the "User Name" and "System Date' when stamping a document. A PDF editor capable of creating forms is needed and is beyond the scope of functionality for AcroPlot Matrix.
It is also important to note that fields can only be added to stamps that have already been imported the stamps palette in AcroPlot Matrix. You must import the stamp thru AcroPlot Matrix before adding any form fields to the PDF file.
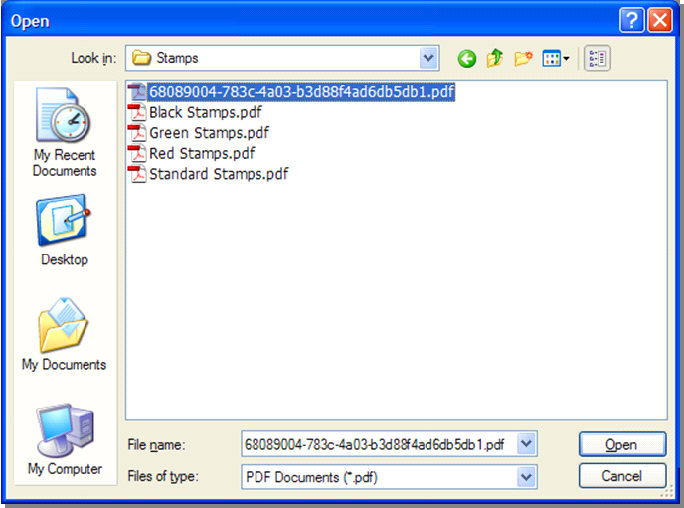
1. Launch AcroPlot Matrix and open the “DRAFT_COPY.pdf” stamp file created earlier. It will have an auto generated name similar to the one seen here.
Windows 7 or Vista
C:\Users\[UserName]\AppData\Roaming\Tracker Software\PDF-XChange Viewer\2.0\Stamps
Windows XP(SP3)
C:\Documents and Settings\[UserName]\Application Data\Tracker Software\PDF-XChange Viewer\2.0\Stamps
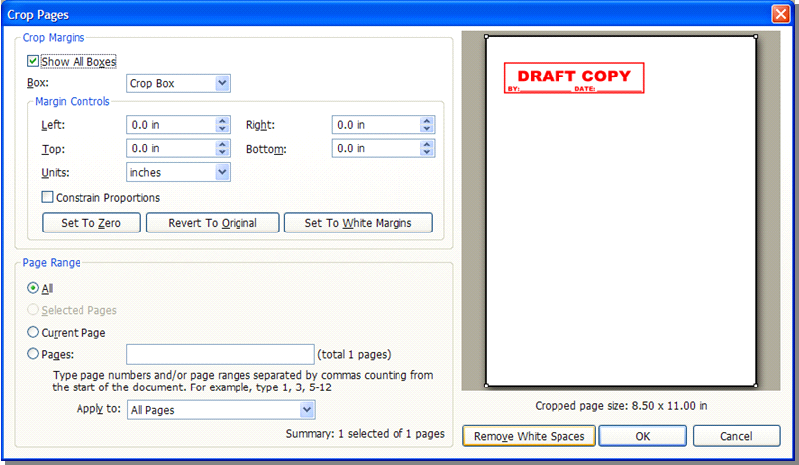
2. Select DOCUMENT > CROP PAGES and select the “Remove White Spaces” button to automatically remove the unused area around the stamp. Save file and close AcroPlot Matrix.
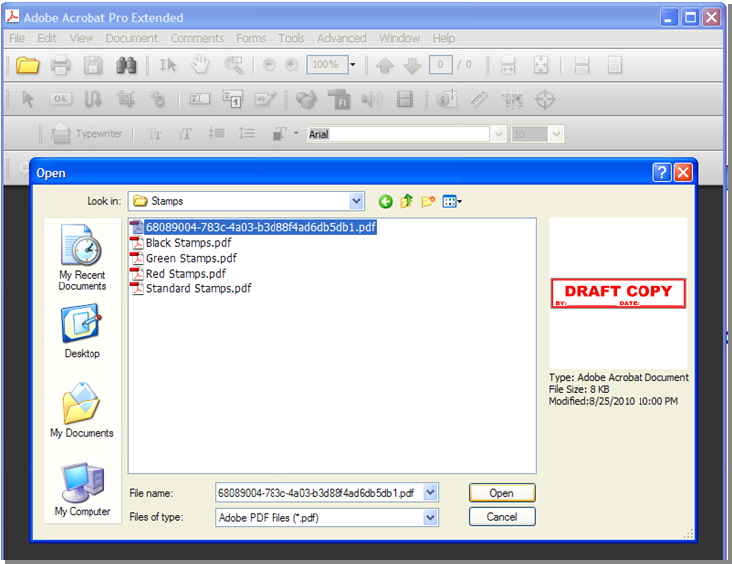
3. Launch a PDF application that is capable of creating PDF forms and open the “DRAFT_COPY.pdf” stamp file that has the auto generated file name.
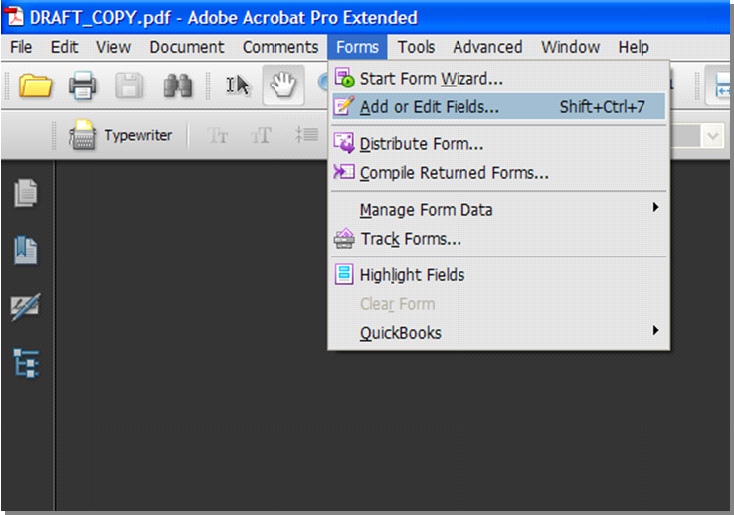
4. To start forms editing select FORMS > ADD or EDIT FIELDS.
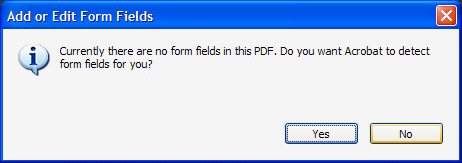
5. A message may appear to auto-create form fields in the “DRAFT_COPY.pdf” file. Select “NO”.
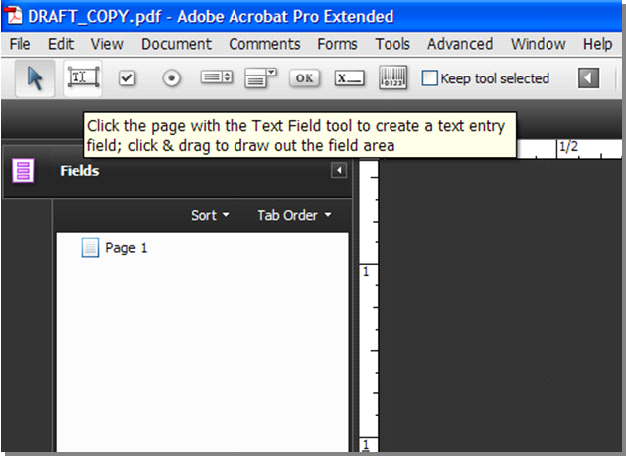
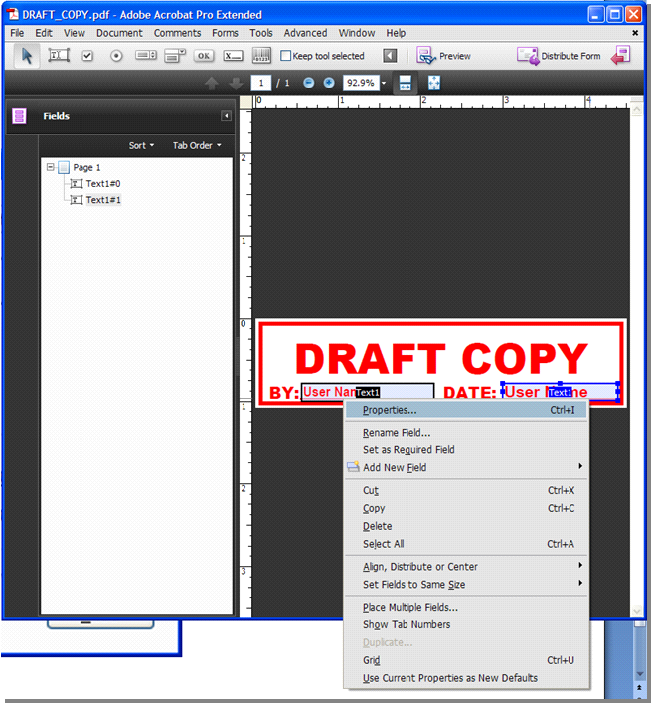
6. Select the “Field Tool” to draw a field on the stamp file.
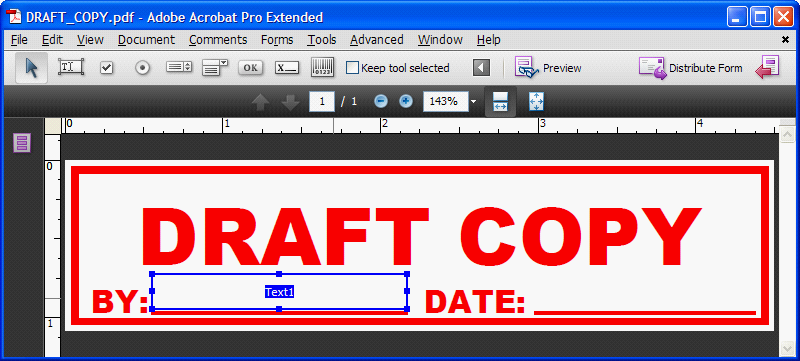
7. Draw the text field so that it is the same length as the line or as shown below.
8. Select the “Preview” button and enter some sample text for font style formatting and then select the “Edit Layout” button when done.
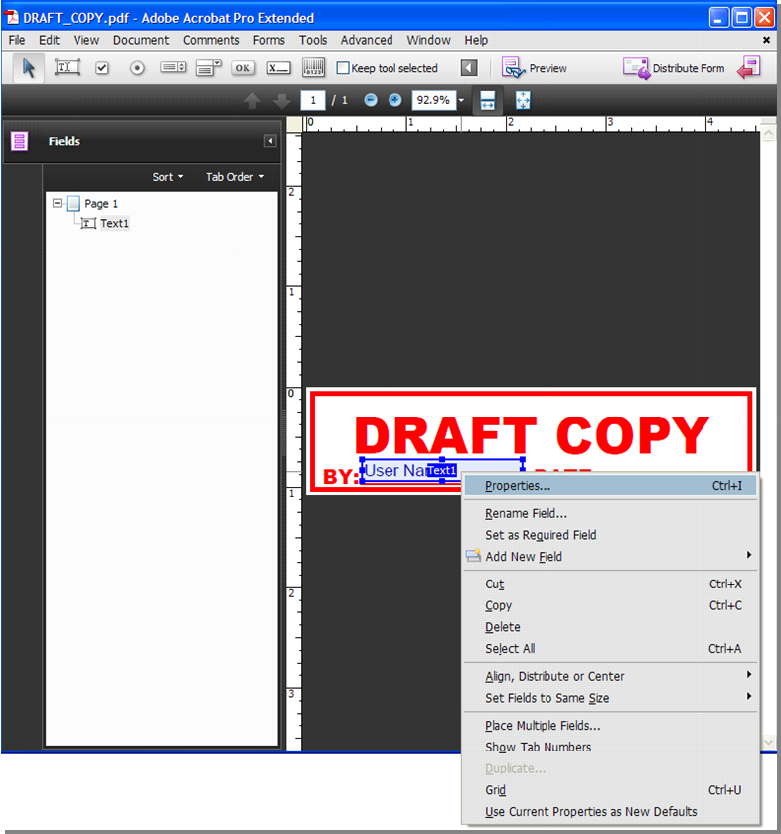
9. Right-click on the “Text1” field and select “Properties”
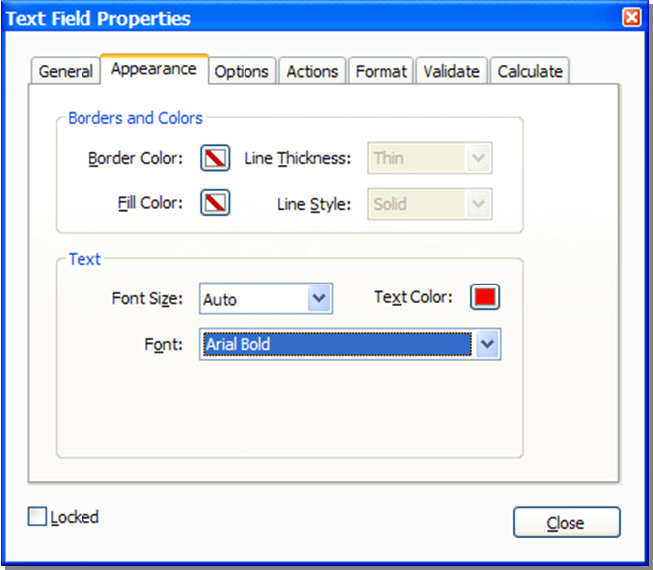
10. Right-click on the “Text1” field and select “Properties” and then select the “Appearance” tab to modify the field properties for font style, text size and color. Note: Setting the “Font Size” to “Auto” will make longer user names fit to the field length automatically.
11. Select the “Calculate” tab, choose the “Custom calculation script” radio button and then the associated “Edit” button.
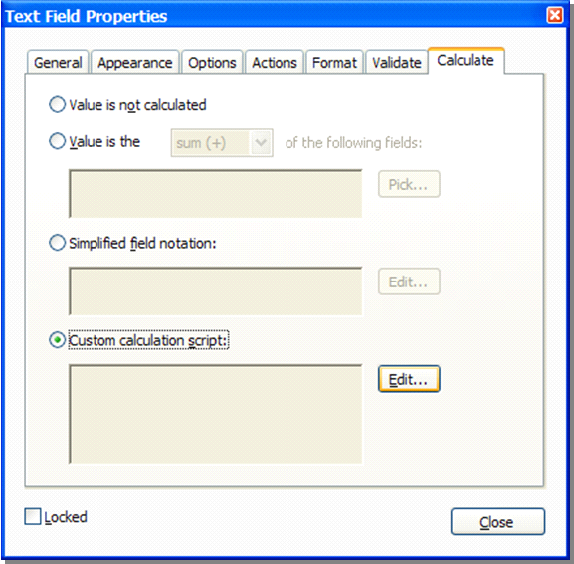
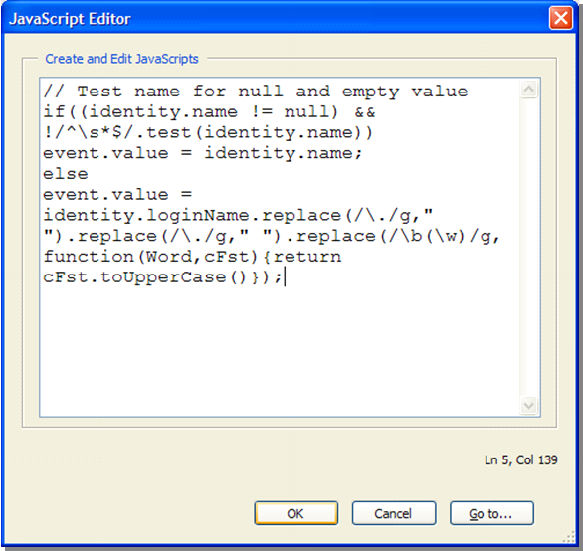
12. Enter the following script into the JavaScript Editor and select “OK” then “Close” Text Field Properties:
// Test name for null and empty value
if((identity.name != null) && !/^\s*$/.test(identity.name))
event.value = identity.name;
else
event.value = identity.loginName.replace(/\./g," ").replace(/\./g," ").replace(/\b(\w)/g, function(Word,cFst){return cFst.toUpperCase()});
13. Right-click on the “Text1” field and select “Copy” and then using the keyboard enter Ctrl+V to paste a duplicate field. Reposition the field and right-click on it to open the “Properties”.
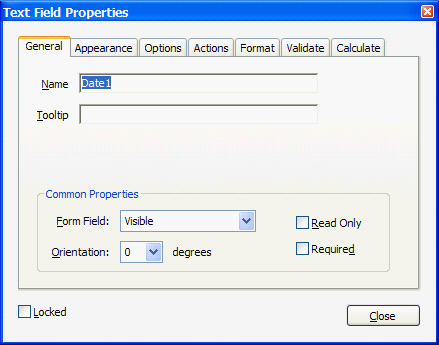
14. Select the “General” tab and change the name from “Text1” to “Date1”.
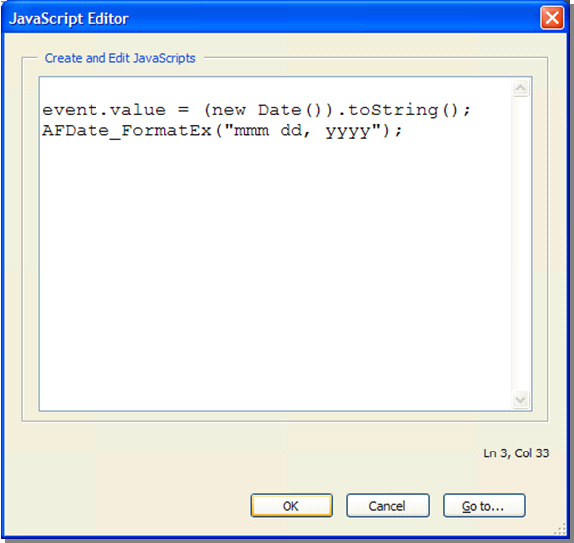
15. Select the “Calculate” tab, choose the “Custom calculation script” radio button and then the associated “Edit” button. Enter the following script into the JavaScript Editor and select “OK” then “Close” Text Field Properties:
event.value = (new Date()).toString();
AFDate_FormatEx("mmm dd, yyyy");
16. Save the file and exit the PDF editing application.
17. Launch AcroPlot Matrix and test the stamp. When the stamp is applied the scripts will execute and automatically enter the Login ID if the User Name in the EDIT > PREFERENCES > IDENTITY is empty. If the login name for the PC is for example, will.munson, then the script will reformat the text to Will Munson.
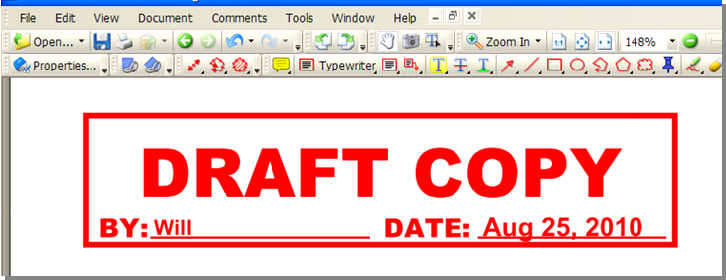
If the user needed to have the stamp apply a totally different name, then by going to EDIT > PREFERENCES > IDENTITY and entering the desired name into the “Name” field will result in an automatic override of the login ID and use the exact value found in the “Name” field.
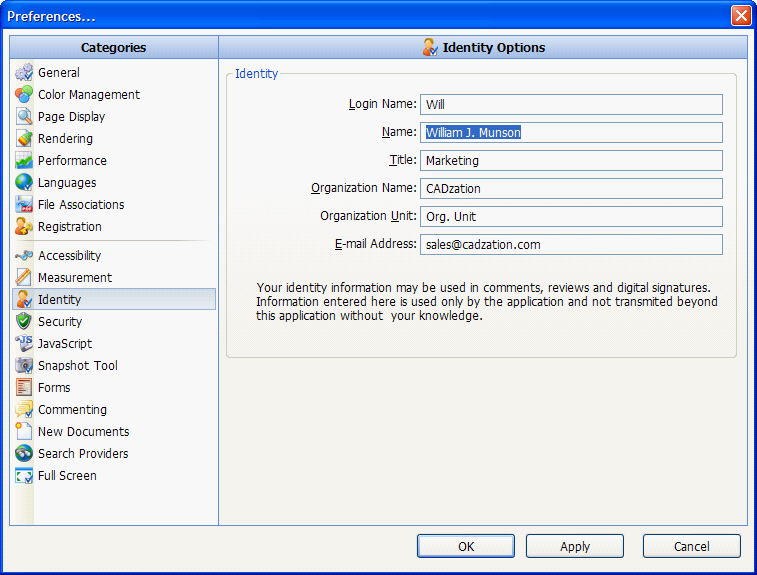
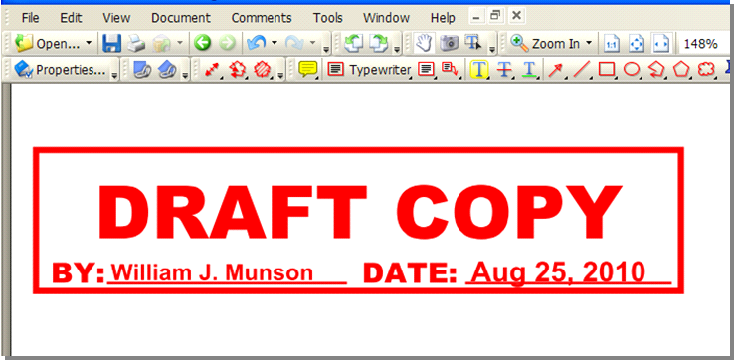
New stamp result with “Name” field value modified to “William J. Munson”.